
Lab 4: Directly Govern your Omni Channel API (Optional)
Overview
API management is essential to an API-Led architecture as it provides a governance framework to your APIs in all three layers. You saw in Lab 1 how MuleSoft can proxy your existing APIs on an API Gateway that is used for enforcing policies and collecting data for analytics.
One unique and powerful feature of MuleSoft is that we can apply governance directly to a MuleSoft implemented API. With governance directly on the service we eliminate the additional hop through an API gateway, and we provide last mile security directly on the service.
The API we will use to demonstrate this is an Omni Channel API that you deployed earlier.
We will use another unique feature of MuleSoft - API auto-discovery. The API auto-discovery capability is used in a Mule application to enable API management from Anypoint Platform on the application HTTP endpoint. When you run an app that incorporates auto-discovery, the auto-discovery process registers and starts the app in API Manager. Registration and start up occurs without user intervention. Your API will be discovered and governed whether it is running on your laptop, on-premise or in the cloud.
Clients will continue to access your deployed Omni Channel API through the same HTTP endpoint. API Manager will manage, control access and monitor the usage of the API, which we will look at in the succeeding labs.
Step 1: Create the API in the API manager
We are going to use the Omni Channel API to implement the API.
-
Navigate to the API Manager page, click on Add API and select Add new API.

-
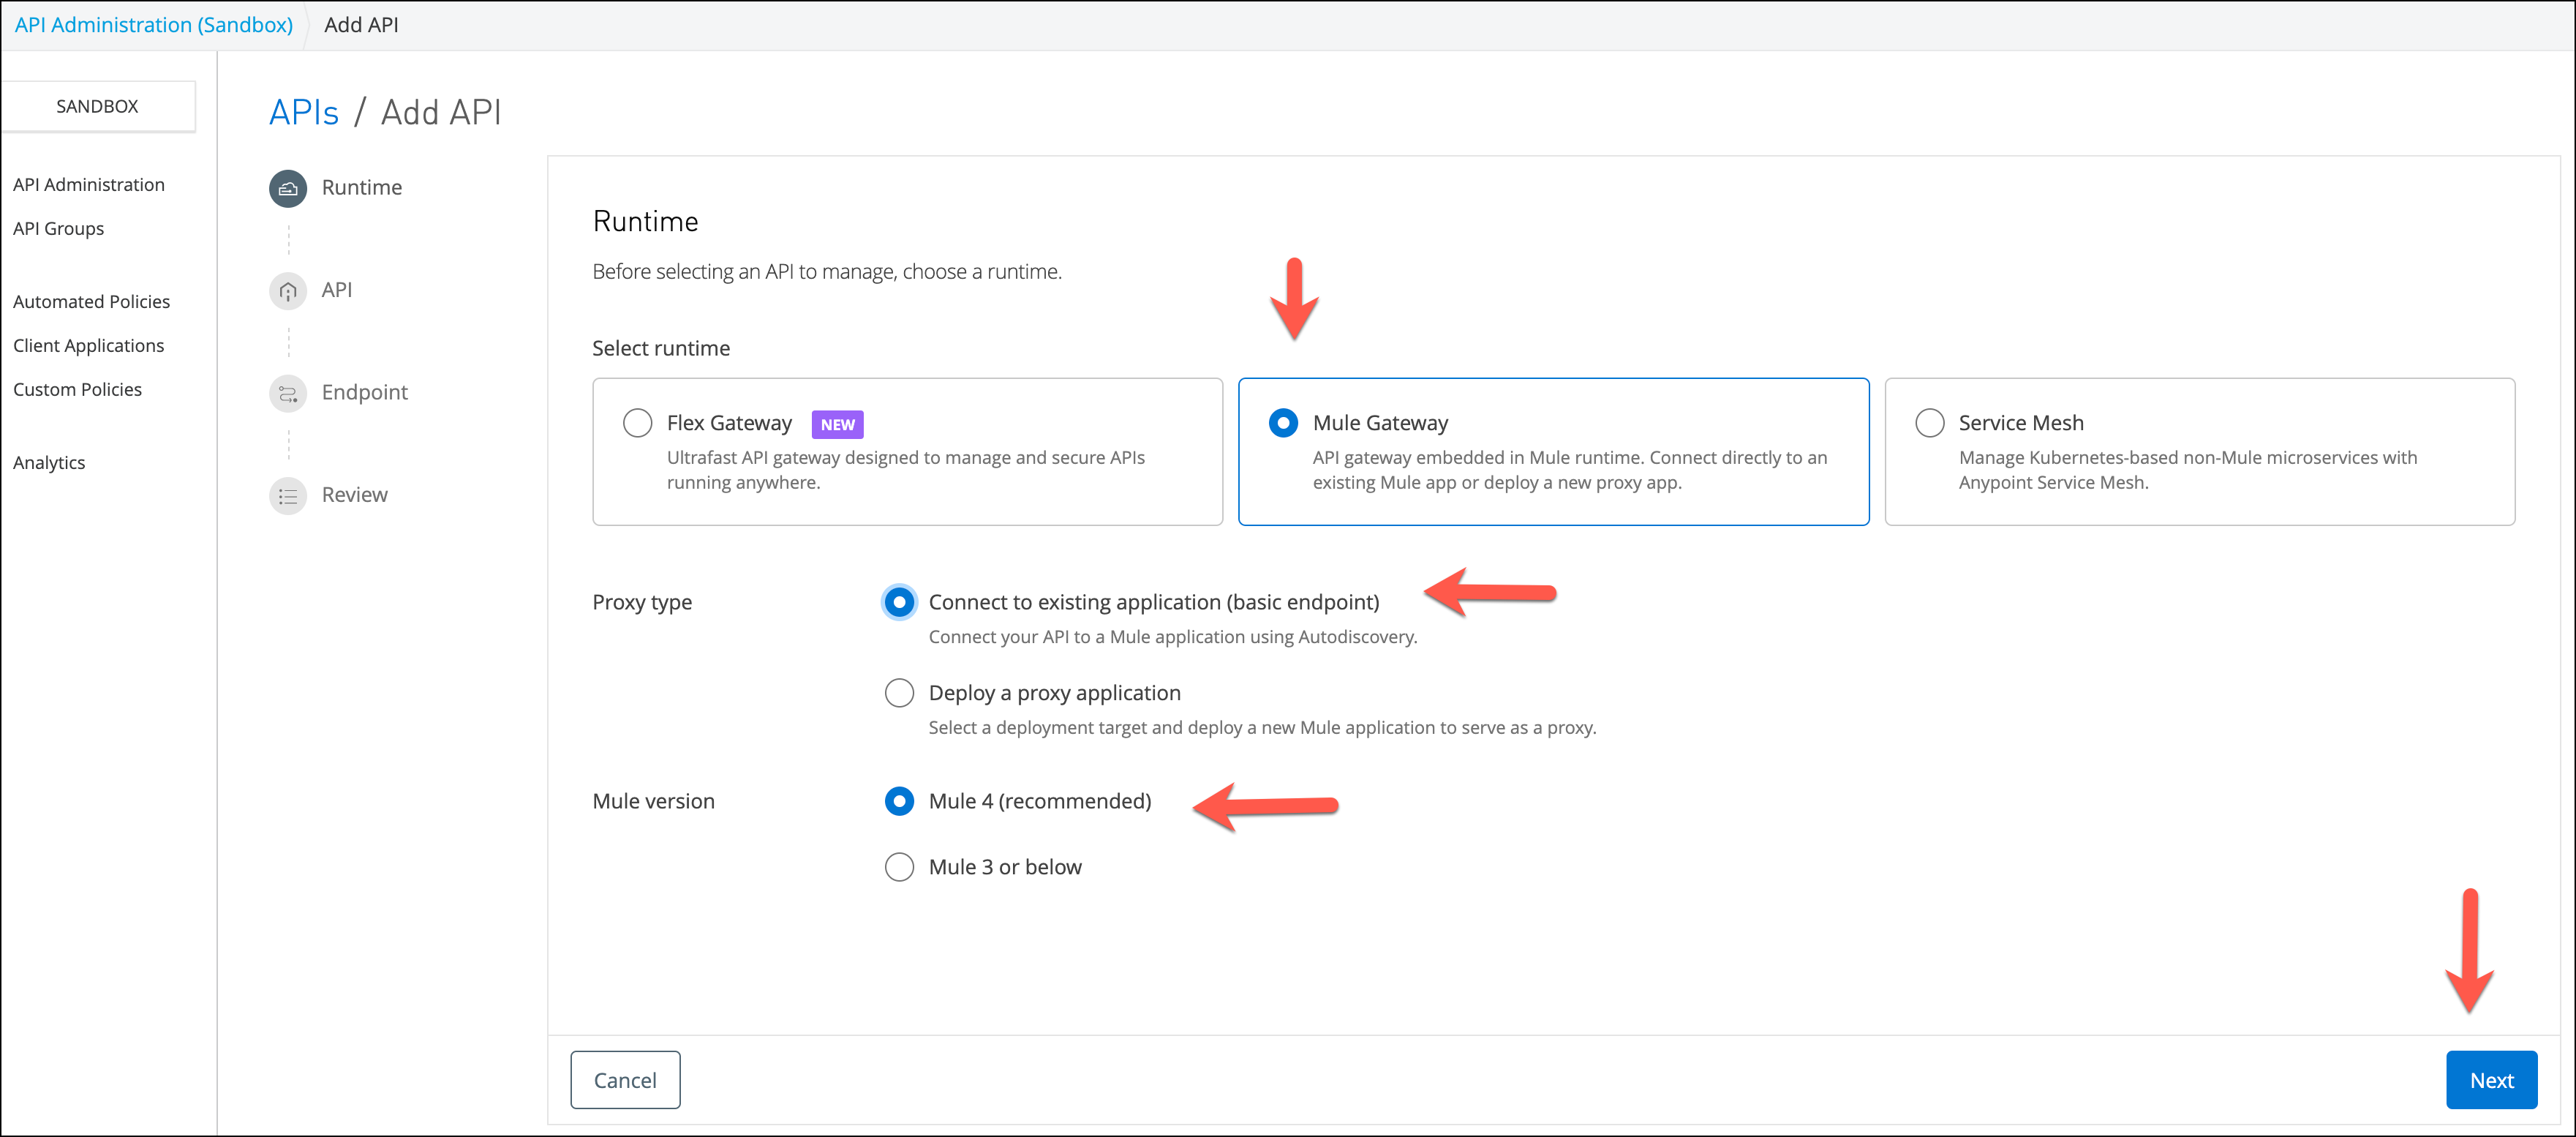
Select Mule Gateway as your runtime, and check the Deploy a proxy application
-
. Configure with the following information:
-
Proxy Type: Connect to existing application (basic endpoint)
-
Runtime version: Select
4.4.0(or the latest version available) property will define the Proxy URL and the name of the Mule application in the Runtime Manager.
-
-
Click Next button
-
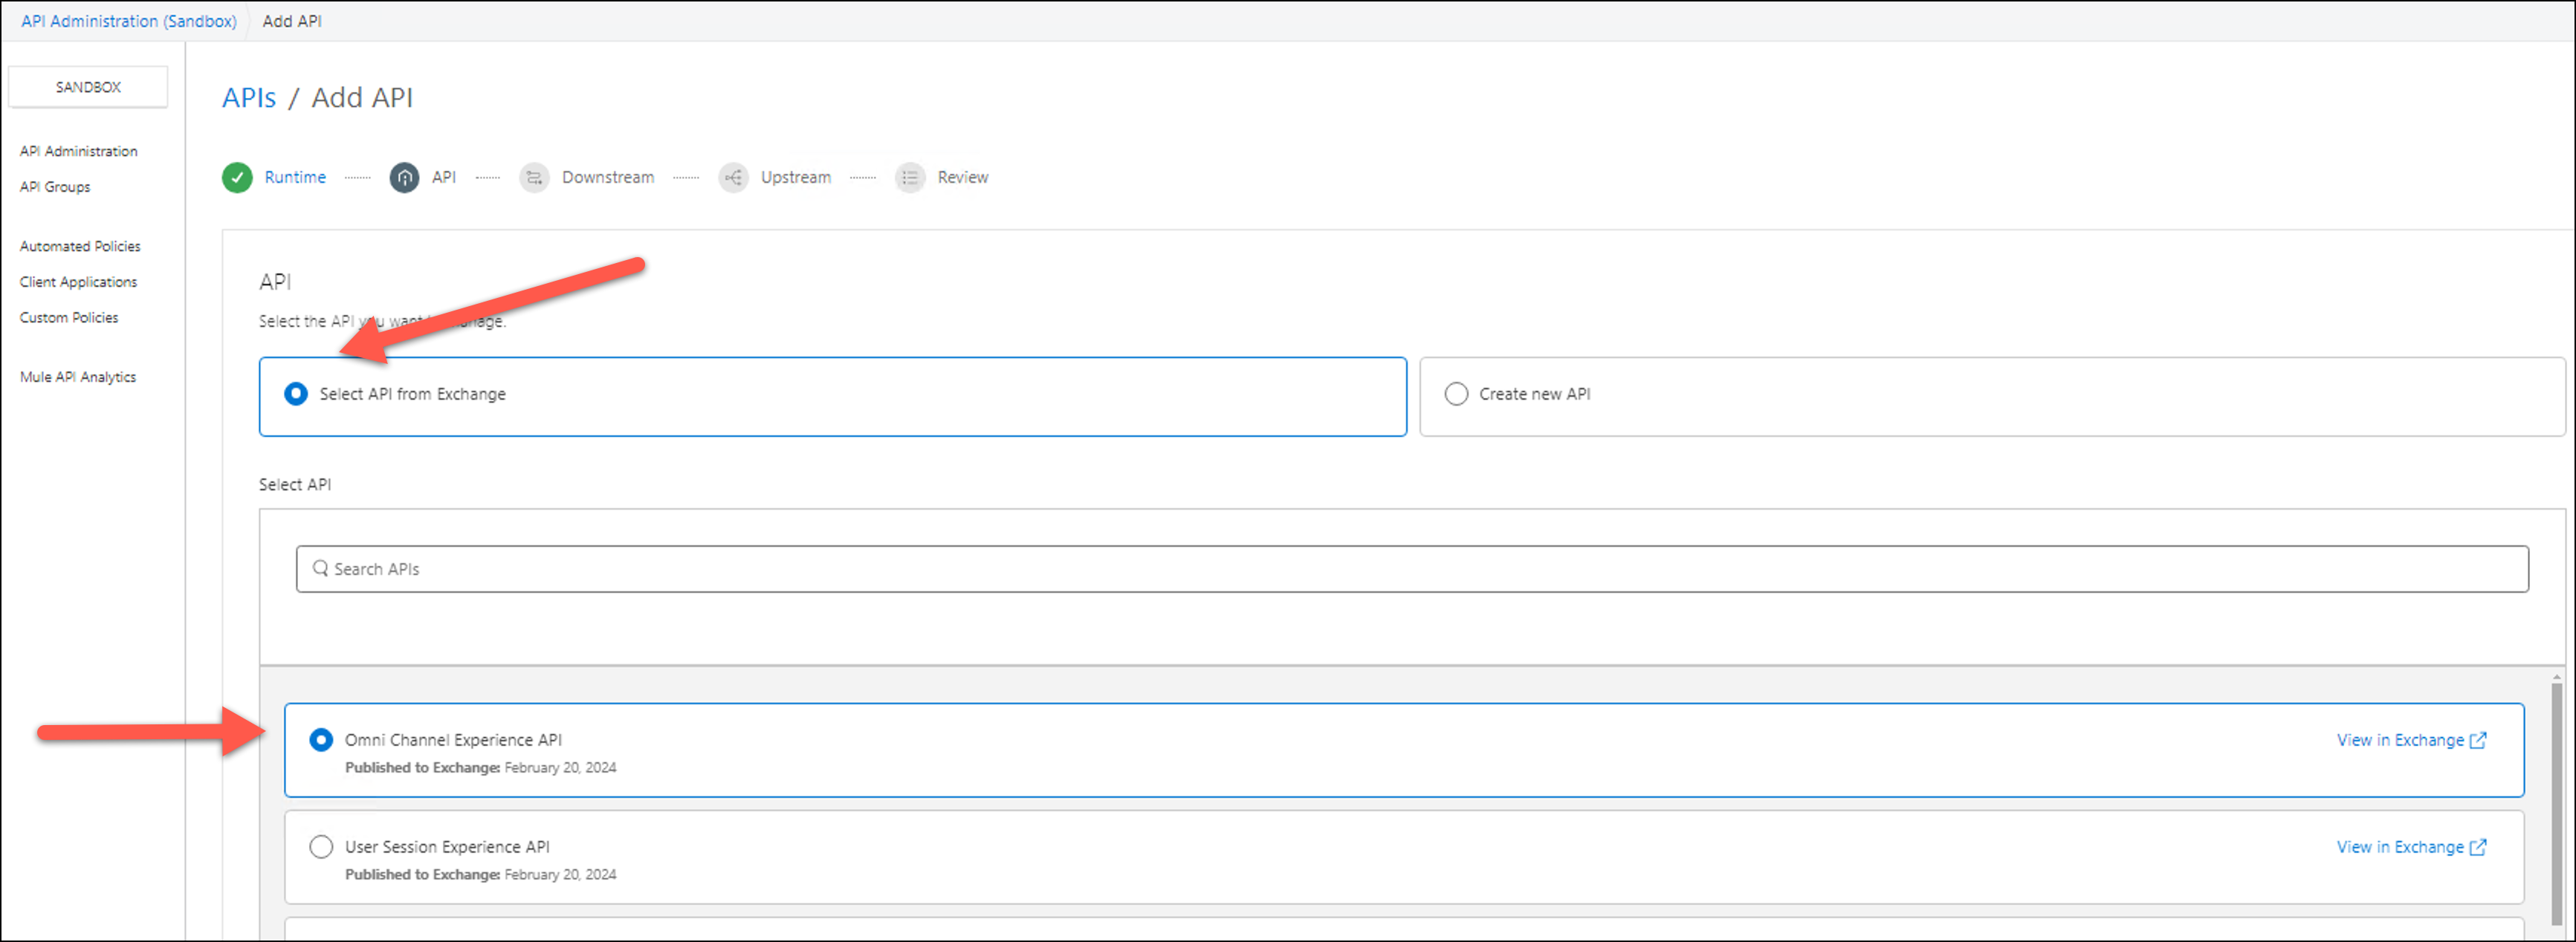
Choose the Select API from Exchange and select Omni Channel Experience API
-
Check the values at the bottom of the screen to match
-
Asset type: Select from the drop down list
RAML/OAS. -
API version: Select from the drop down list
1.0.0. -
Asset version: Select from the drop down list
1.0.0.
-
-
Then press Next

-
Configure the API with the following information:
-
API instance Label:
<username>-impl-omni-channel. This Parameter is going to be used to identify the API in the API Manager.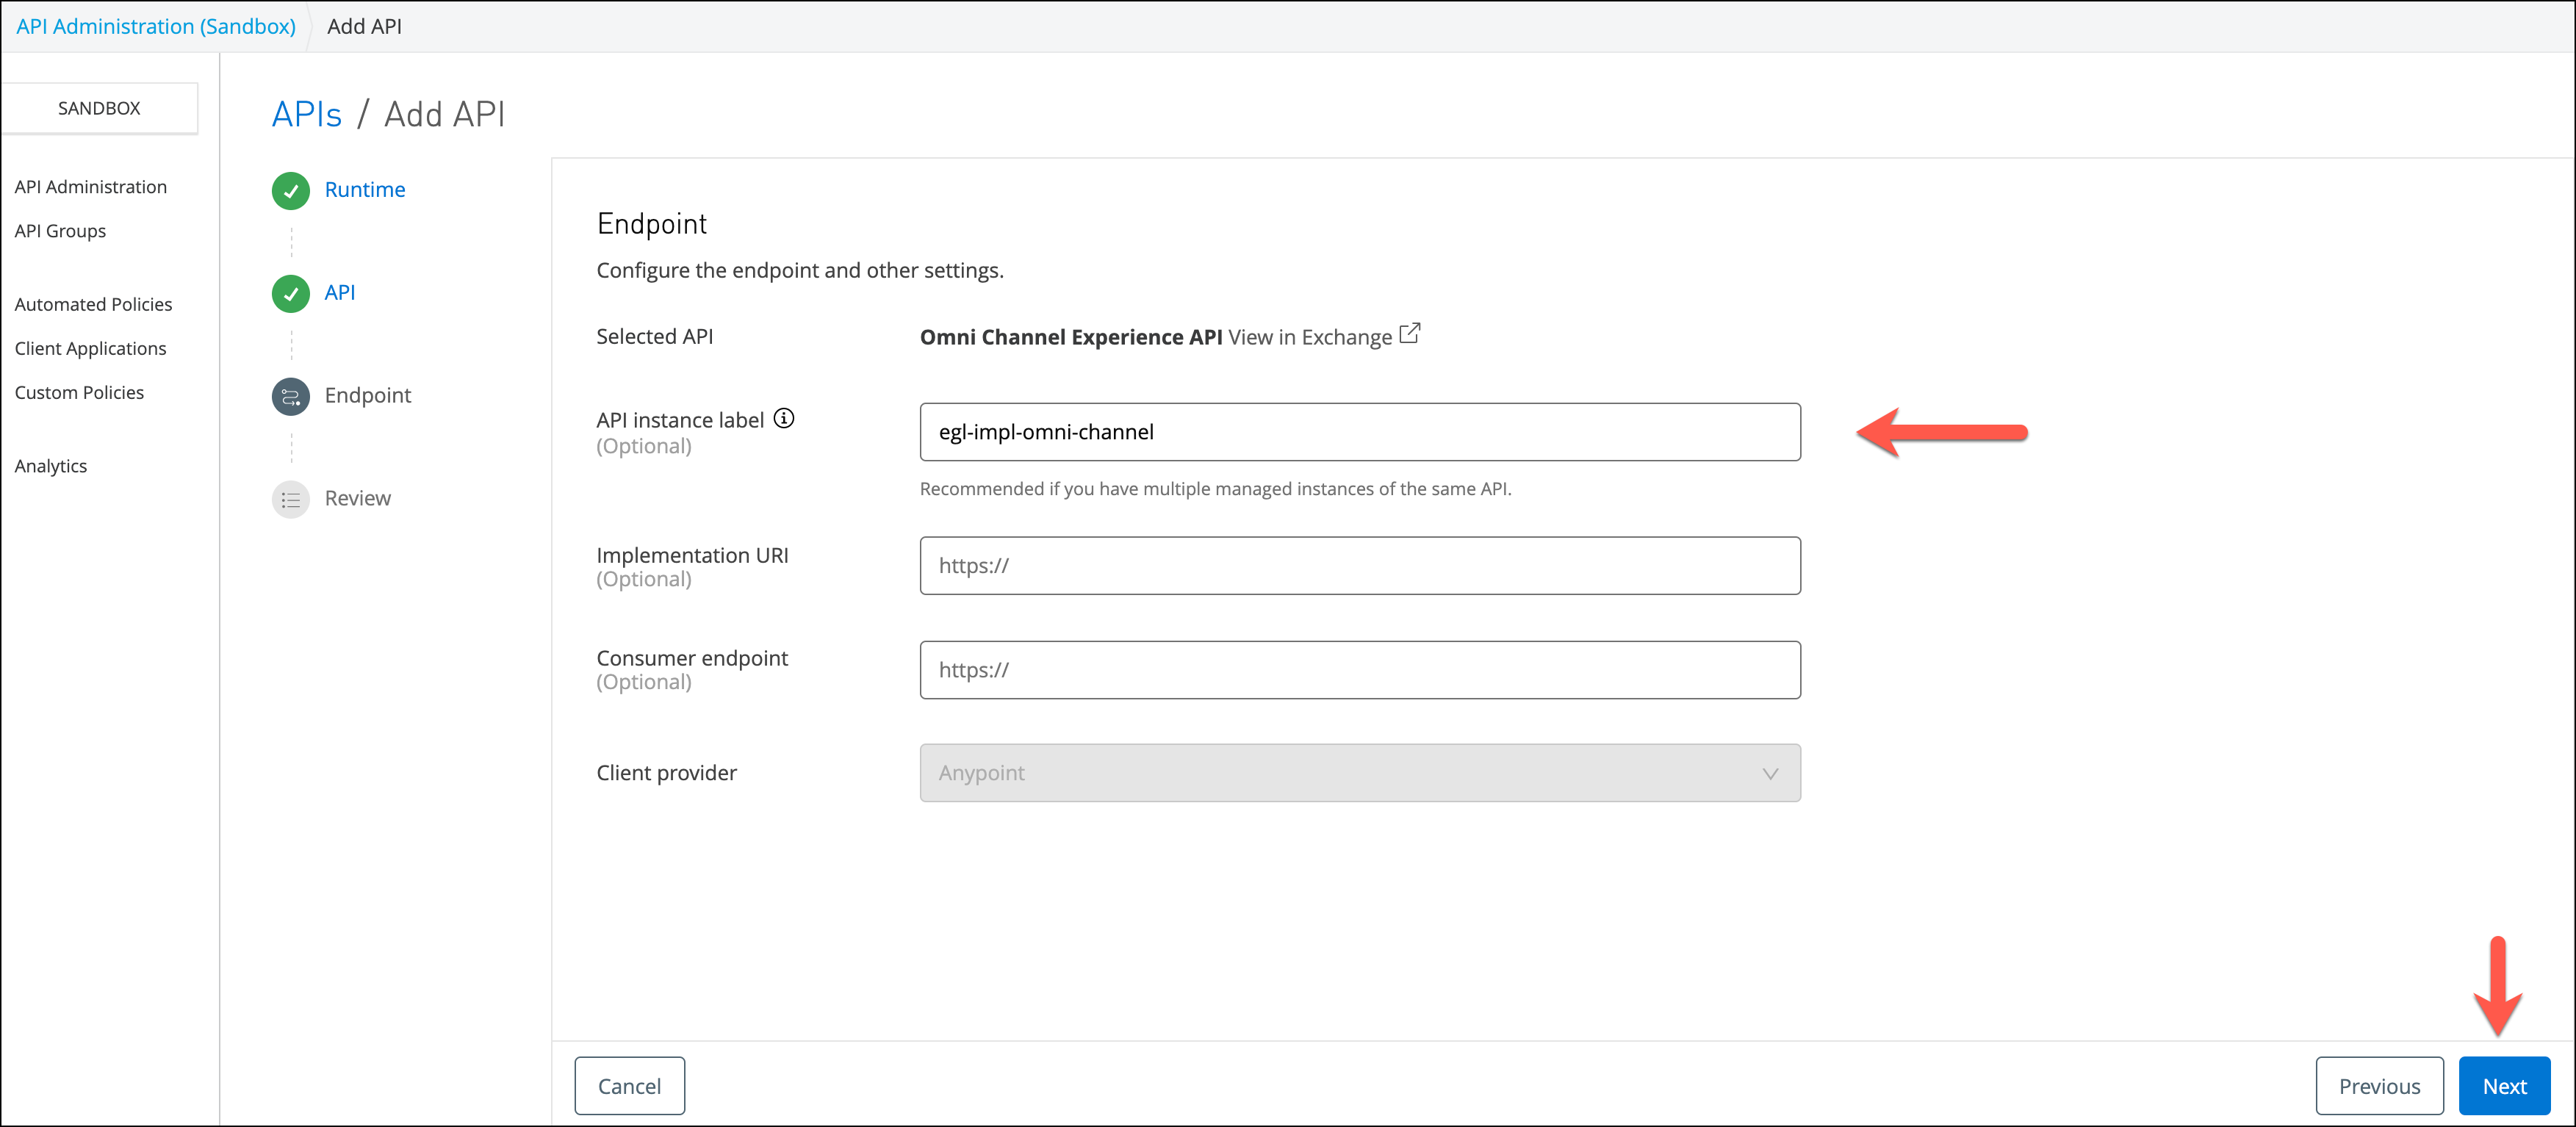
-
-
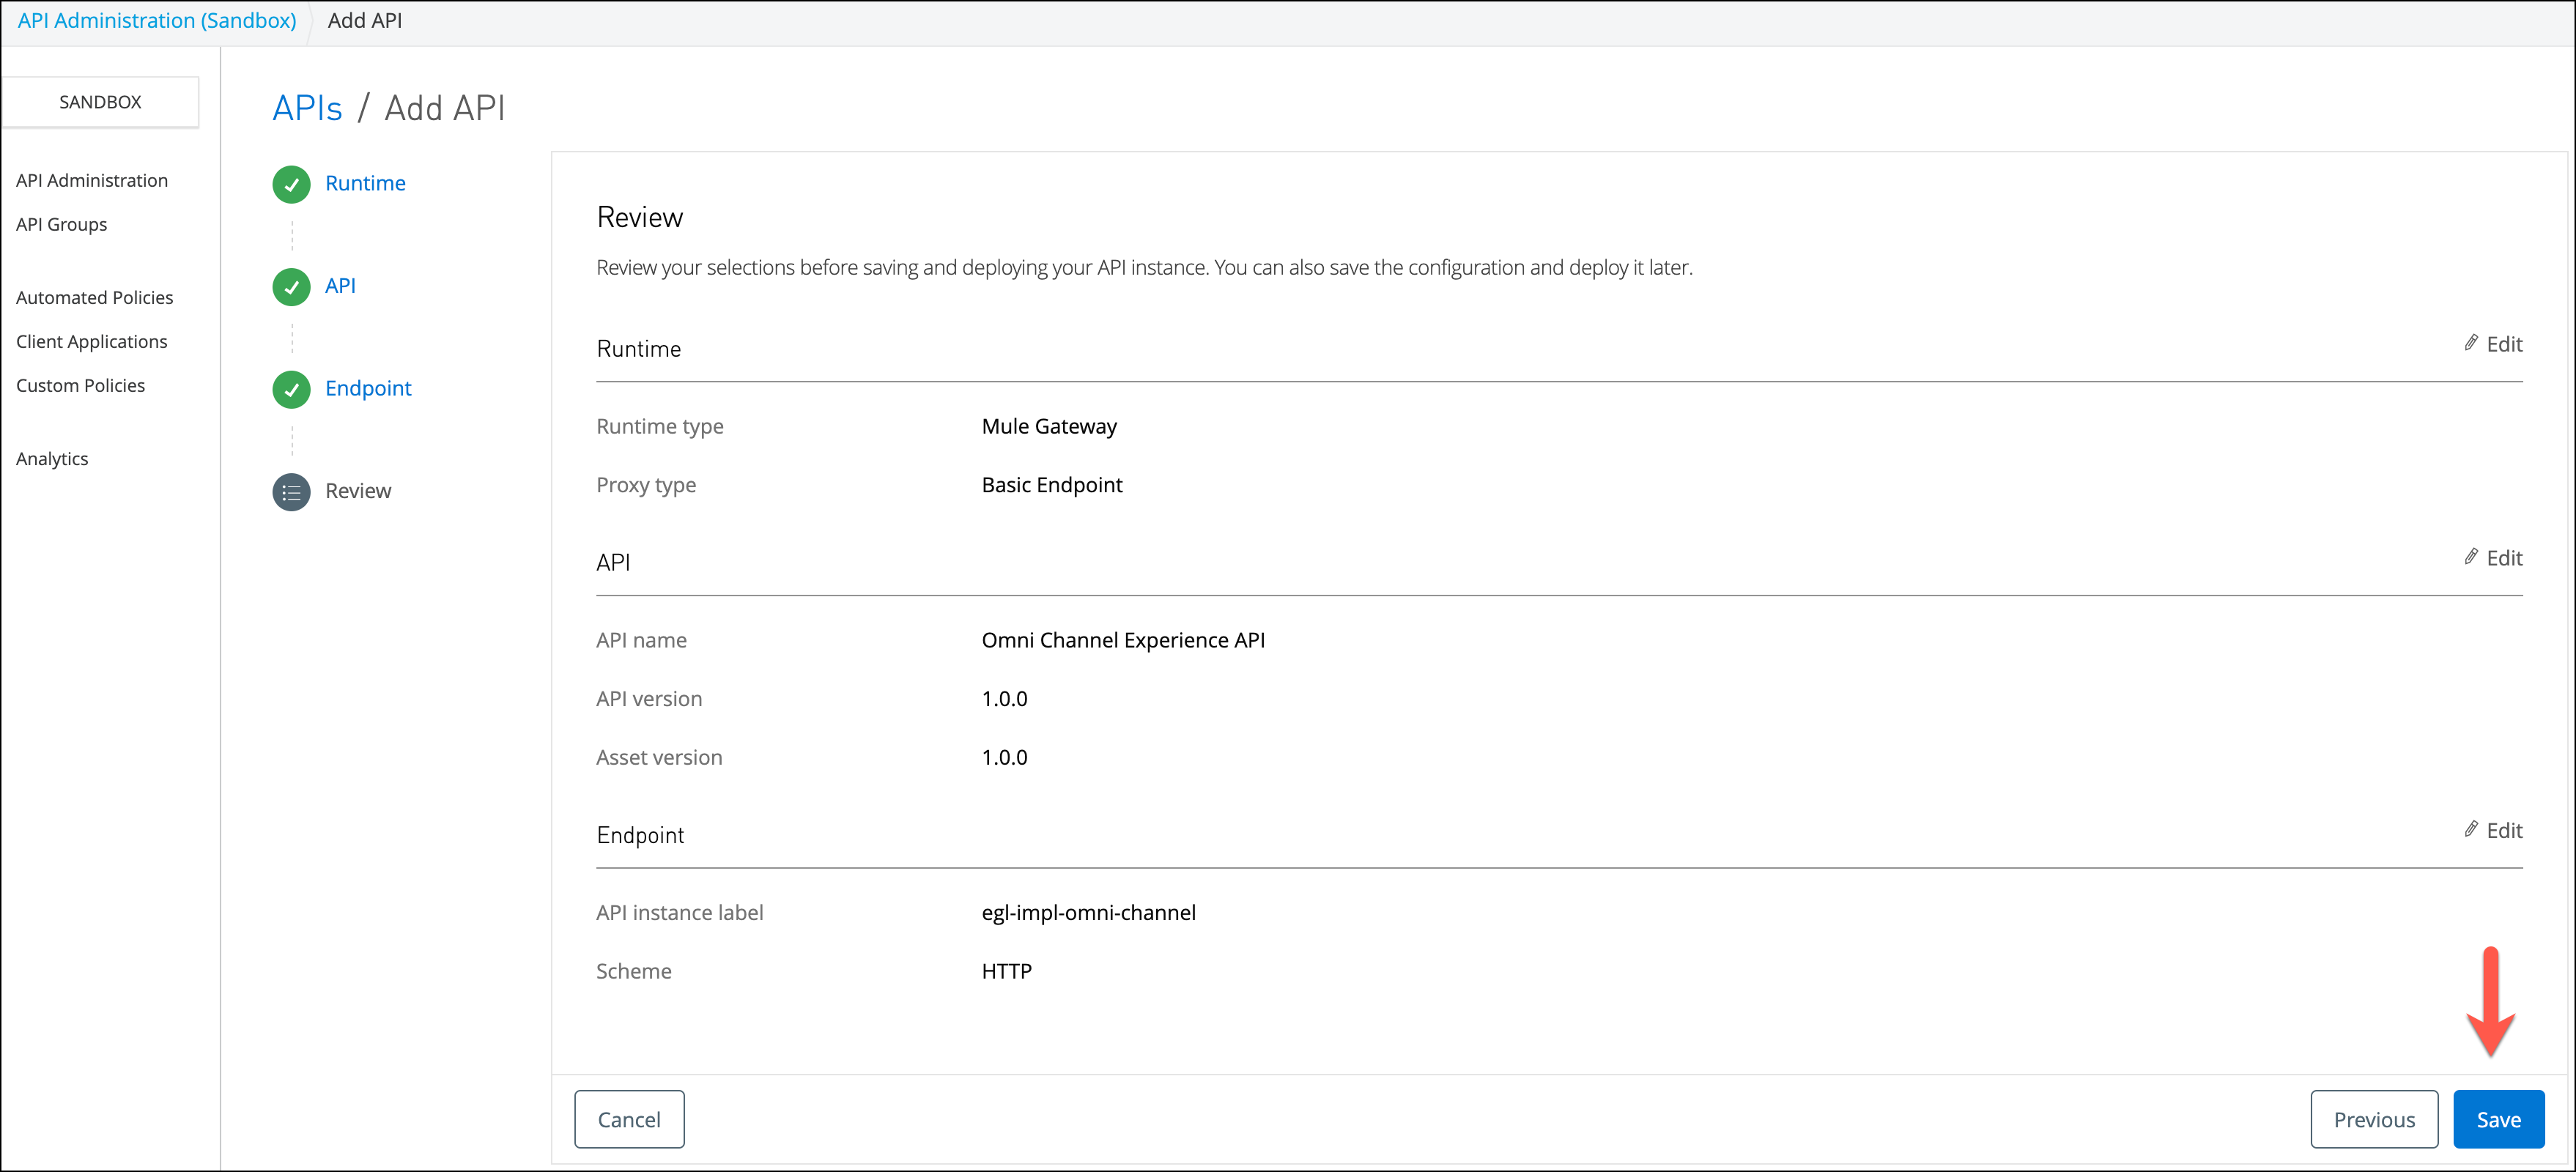
Press Next and to check your configuration:
-
If your configurations is correct and press Save
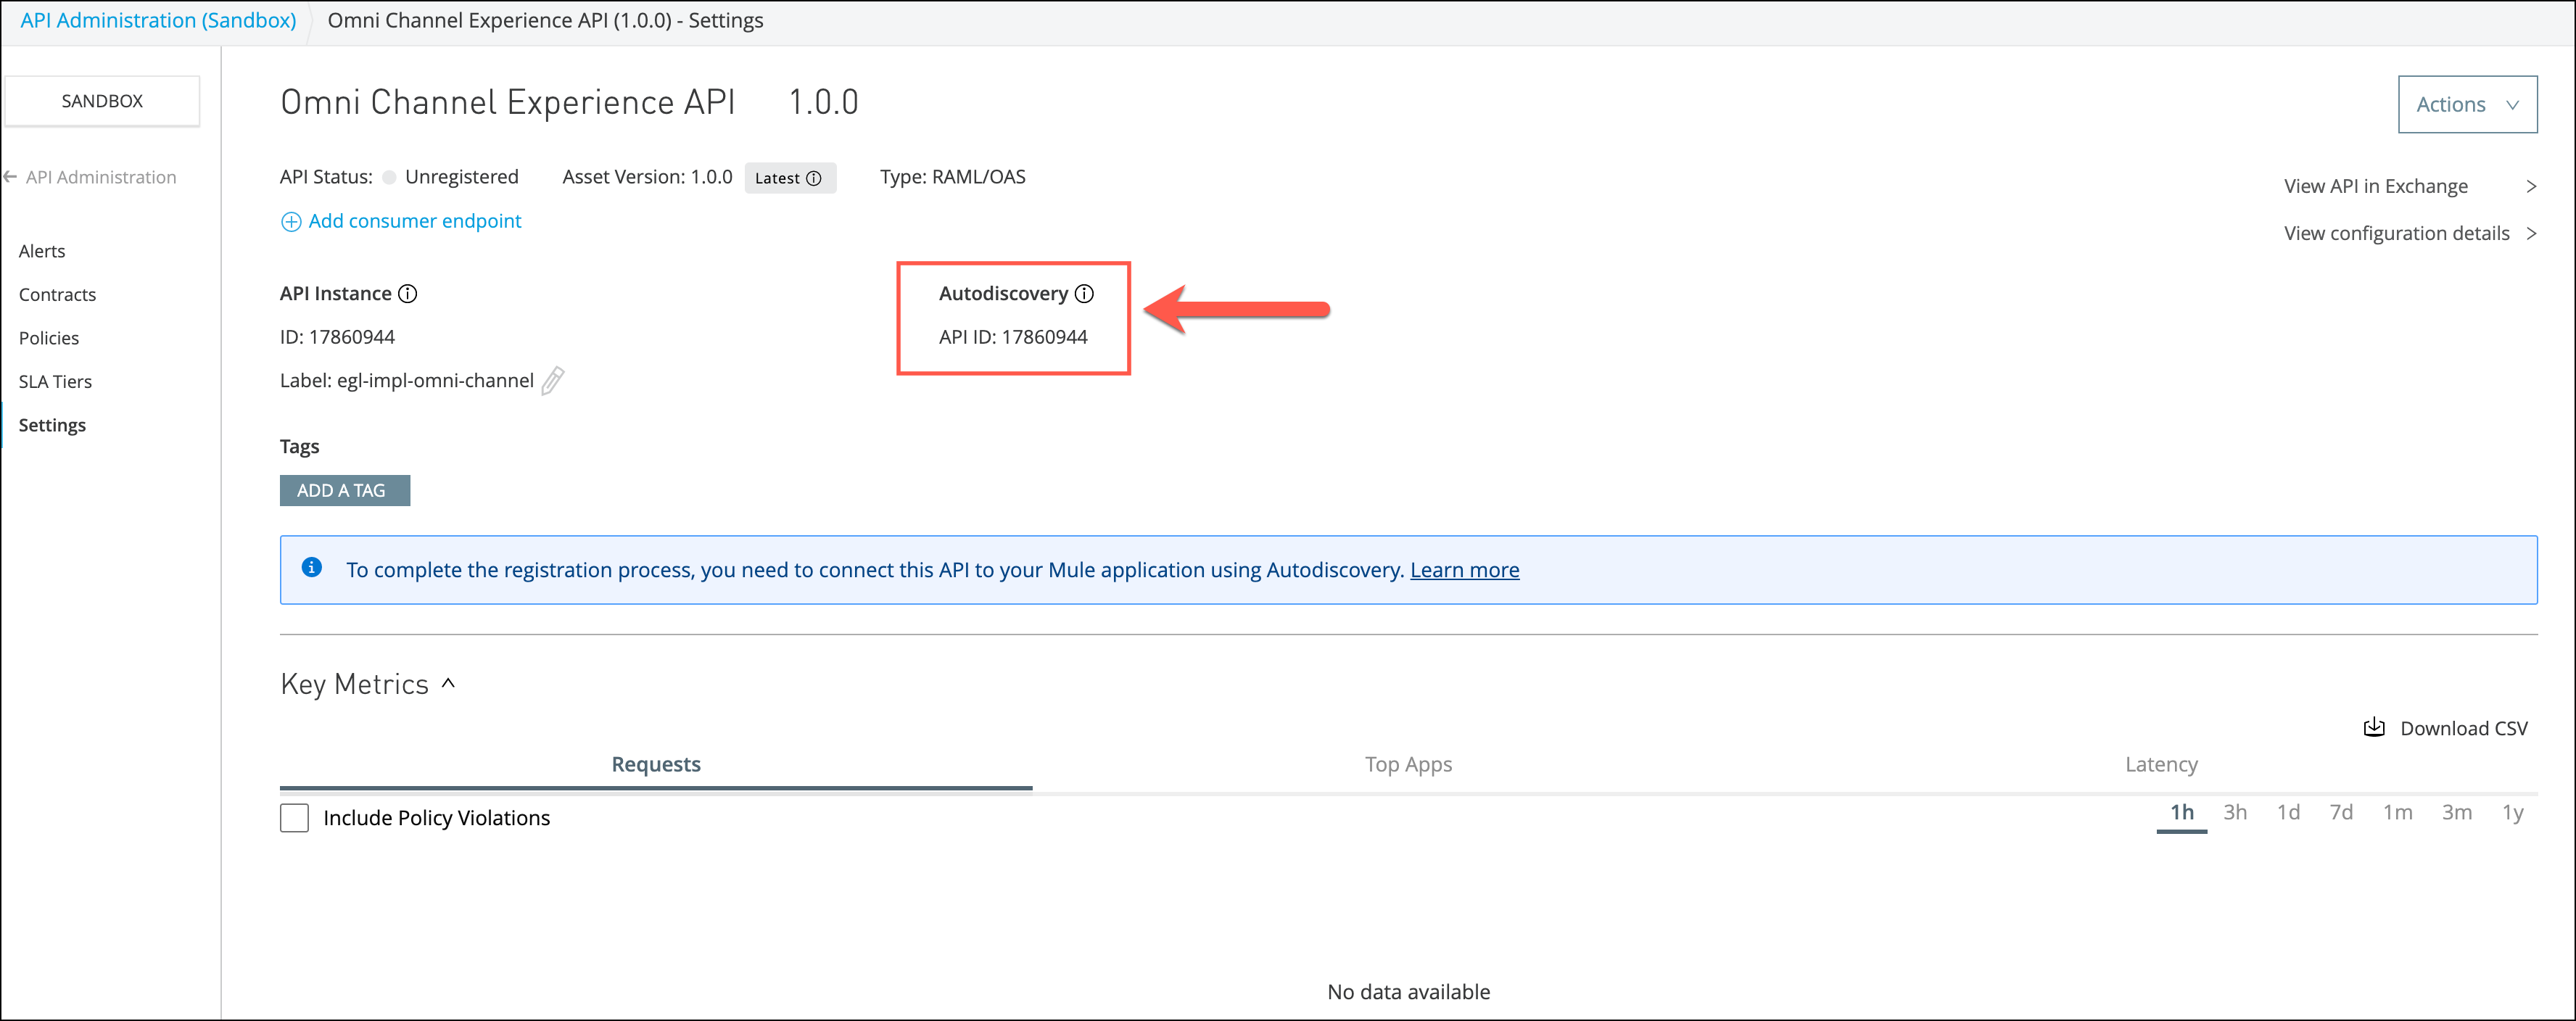
After pressing the save button, a screen with the API configuration will appear. Take note of the API ID. It will be used to configure the autodiscovery component.
Step 2: Return to the complete Omni Channel Project in Anypoint Studio
-
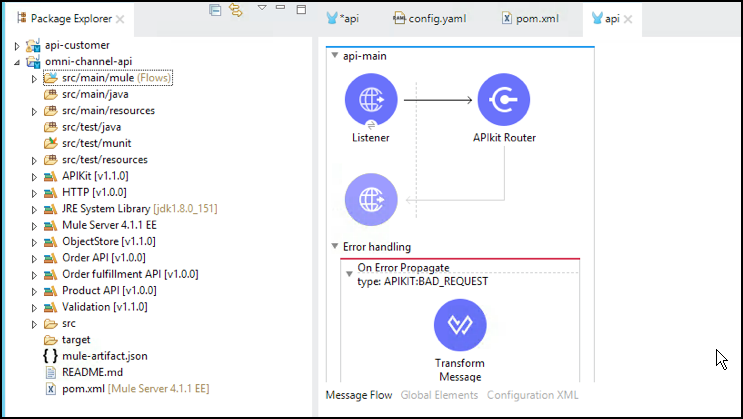
In case you already downloaded the complete Omni Channel Project in Anypoint Studio ona previous module, open that project in Studio. Then proceed to Step 3: Enable API Pairing with the Anypoint Platform.
-
If you have not downloaded it on a previous module, the following steps will detail how to download the complete Omni Channel Project from Exchange into Studio.
-
Start Anypoint Studio from the desktop icon.
-
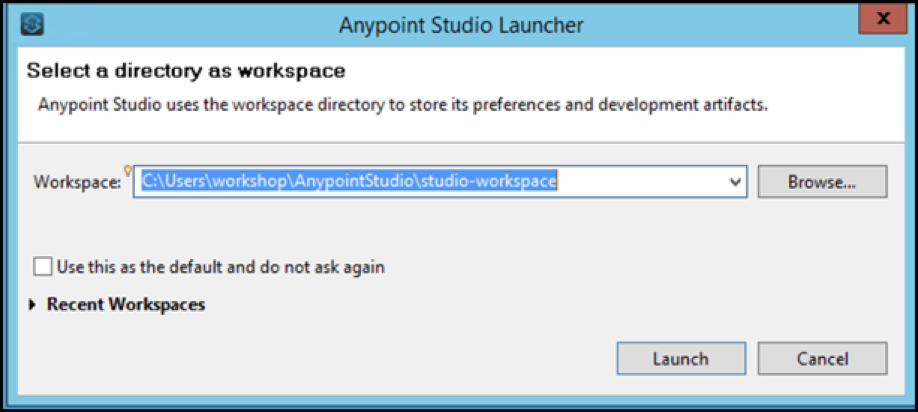
When you open the Studio for the first time, you are going to be asked for the workspace where the projects are going to be saved. Select the workspace displayed by default.
-
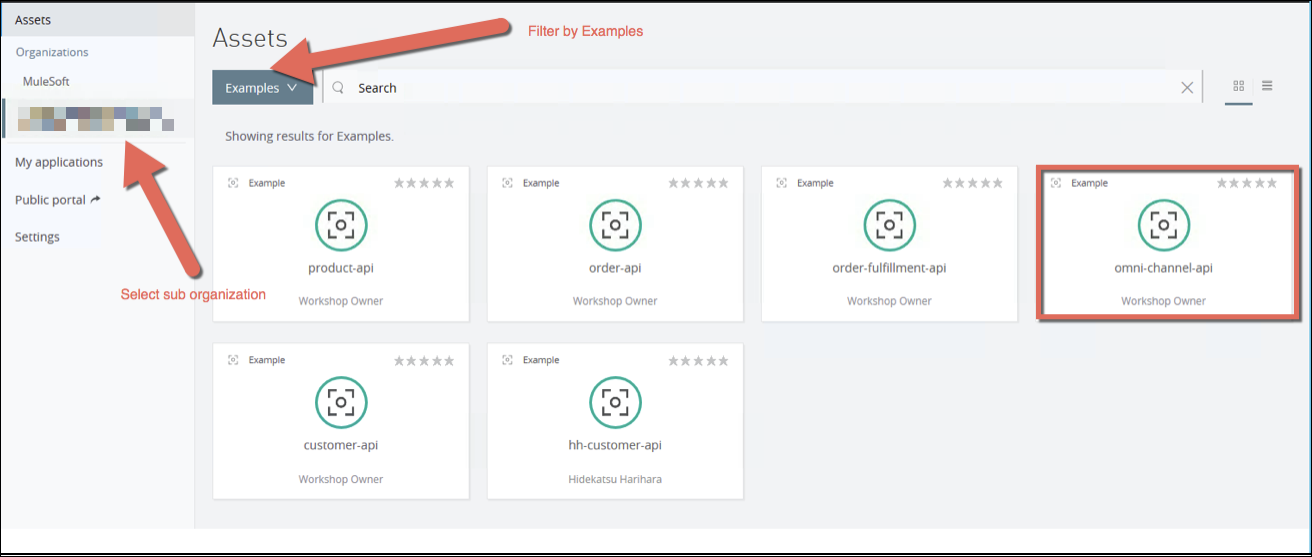
From Studio open exchange

-
Filter by Examples
-
Select the sub organization
-
Click on the omni-channel-api
-
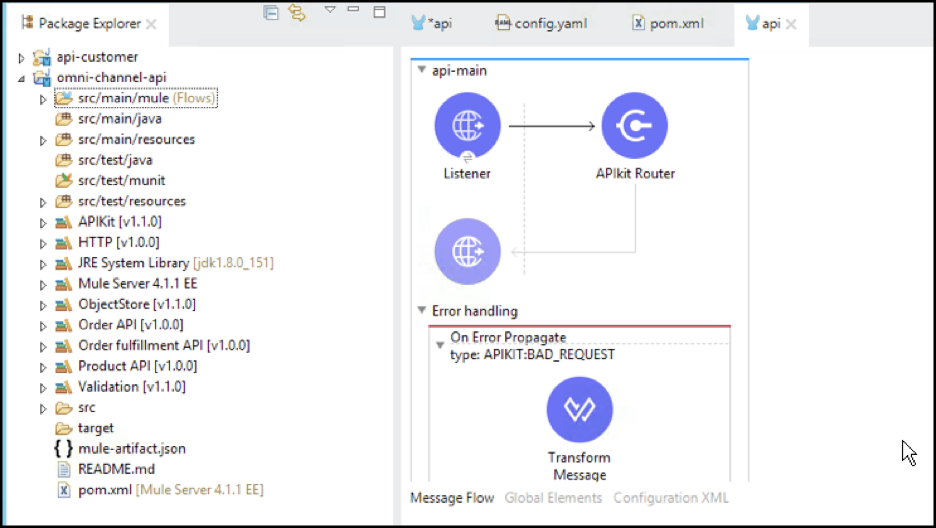
In the portal press Open

Once opened, the project will be imported into Studio.
Step 3: Enable API Pairing with the Anypoint Platform
Your application must have the correct client credentials for your organization in order to be auto-discovered.
-
On the Anypoint platform select Access Management
-
Select Business Groups from the left menu
-
Choose the workshop Business Group

-
Select Environments
-
Select Sandbox

-
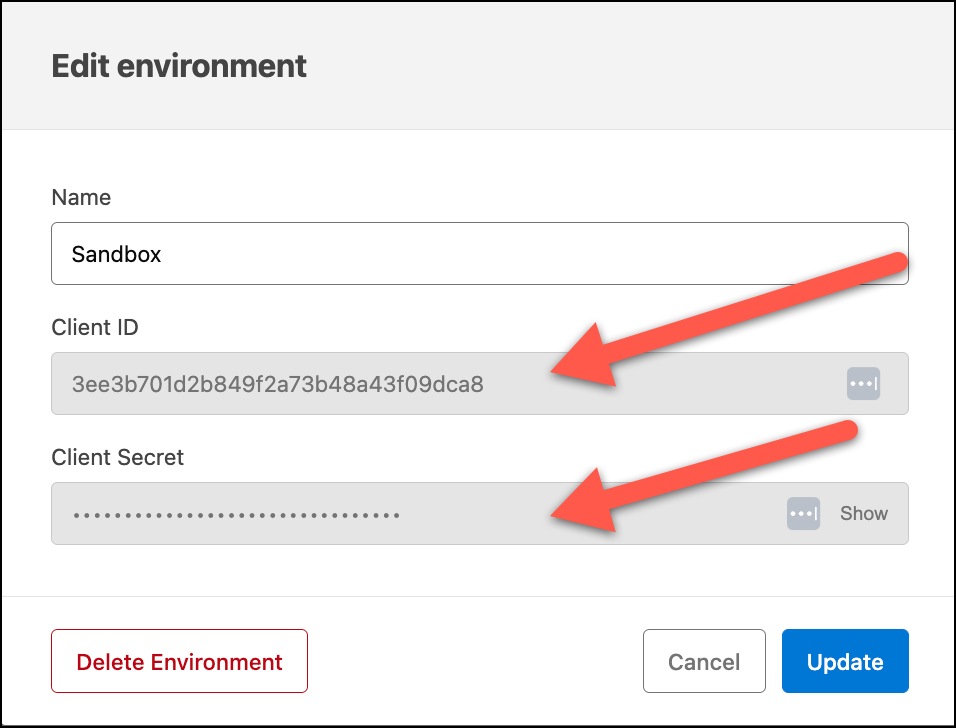
You use the client_id and client_secret in Studio for API pairing. To show the client_secret click on Show.
-
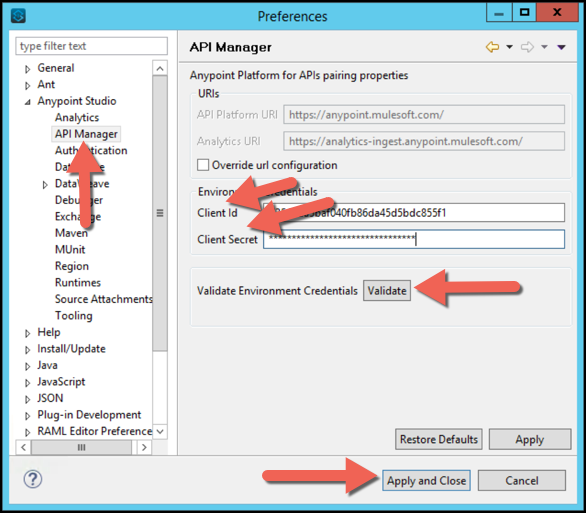
Back in Anypoint Studio, we need to go to Preferences from the main menu (on a Mac it’s under Anypoint Studio→*Preferences*. In Windows it’s under Window→*Preferences*). Search for and select API Manager. Copy and paste the client_id and client_secret in the client credentials fields. Check that they are correct by clicking Validate. Click Apply and Close.
Step 4: Create the API Autodiscovery Global Element
-
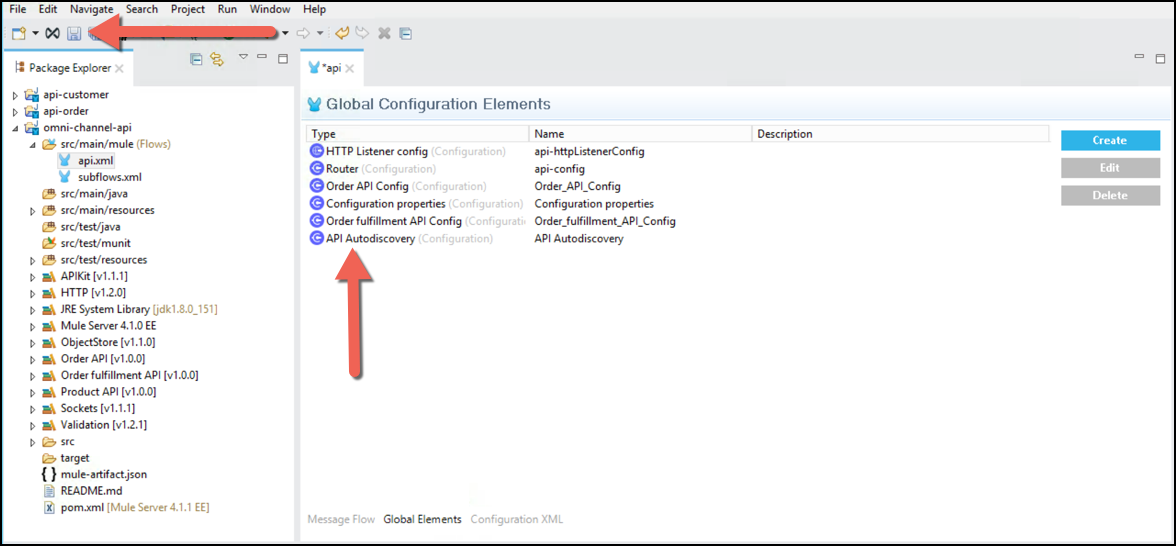
Click on the Global Elements tab just at the bottom of the Canvas.
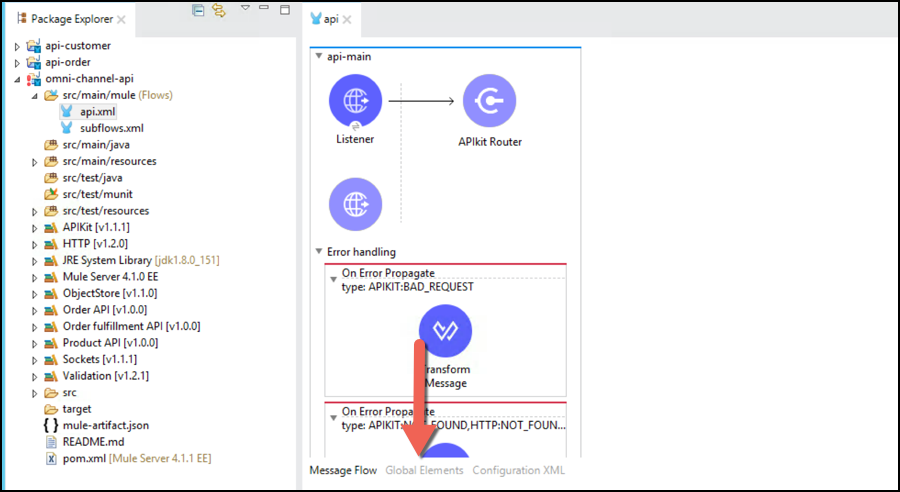
-
Click on Create
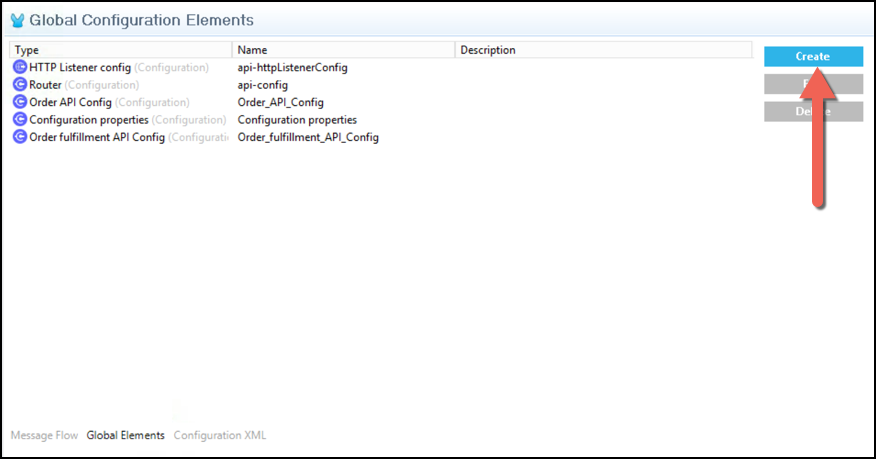
-
Using the Filter, search for auto and select API Autodiscovery and click OK
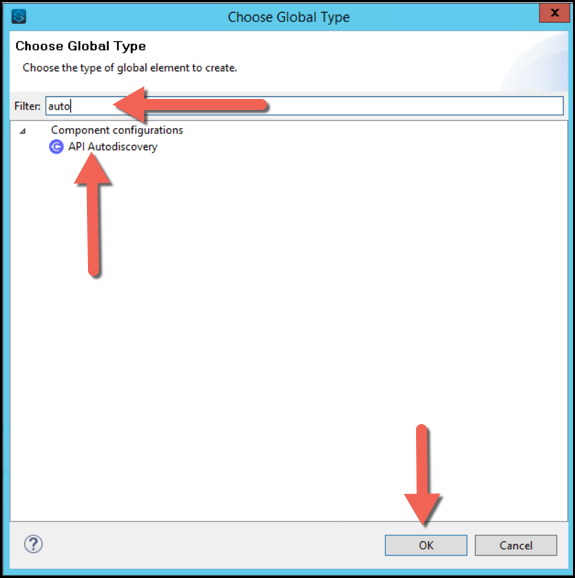
-
Fill in the API Id and Flow Name.
To get this value, we need to get the information from the API Manager.
-
Go to the API Manager and look for the API you created on the Step 1.

The API is in Unregistered state because it hasn’t been paired yet. -
Take note of the API ID

-
-
Complete the API ID with the API ID obtained in the last step.
-
Select api-main for Flow Name
-
Click OK
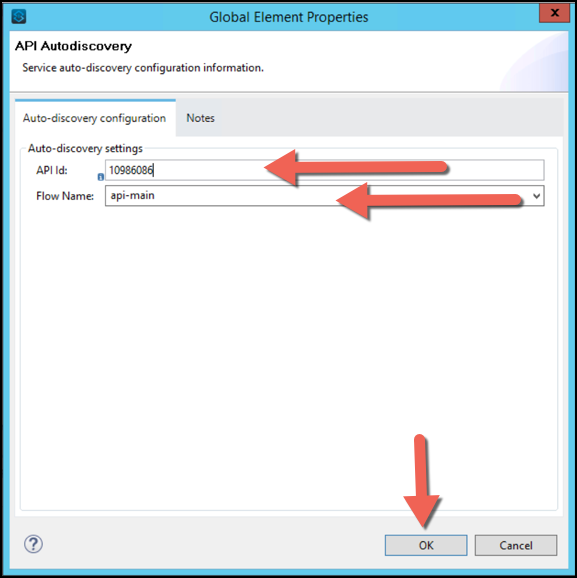
You should see the new API autodiscovery global element. Save your project.
Step 5: Test that the Application is Pairing Correctly with API Manager
-
Start your application in test mode (you might have learned how to do it ona previous module). After your application has started correctly, go to API Manager and see if your API Status is now Active. This may take a minute.

-
Congratulations! Your Omni Channel application will now be governed by API Manager whether it’s running in test mode, on-premise or in the cloud.
Step 6: Redeploy Your API Omni Channel Application
-
Redeploy your application.
In case you need to select an environment, choose Sandbox 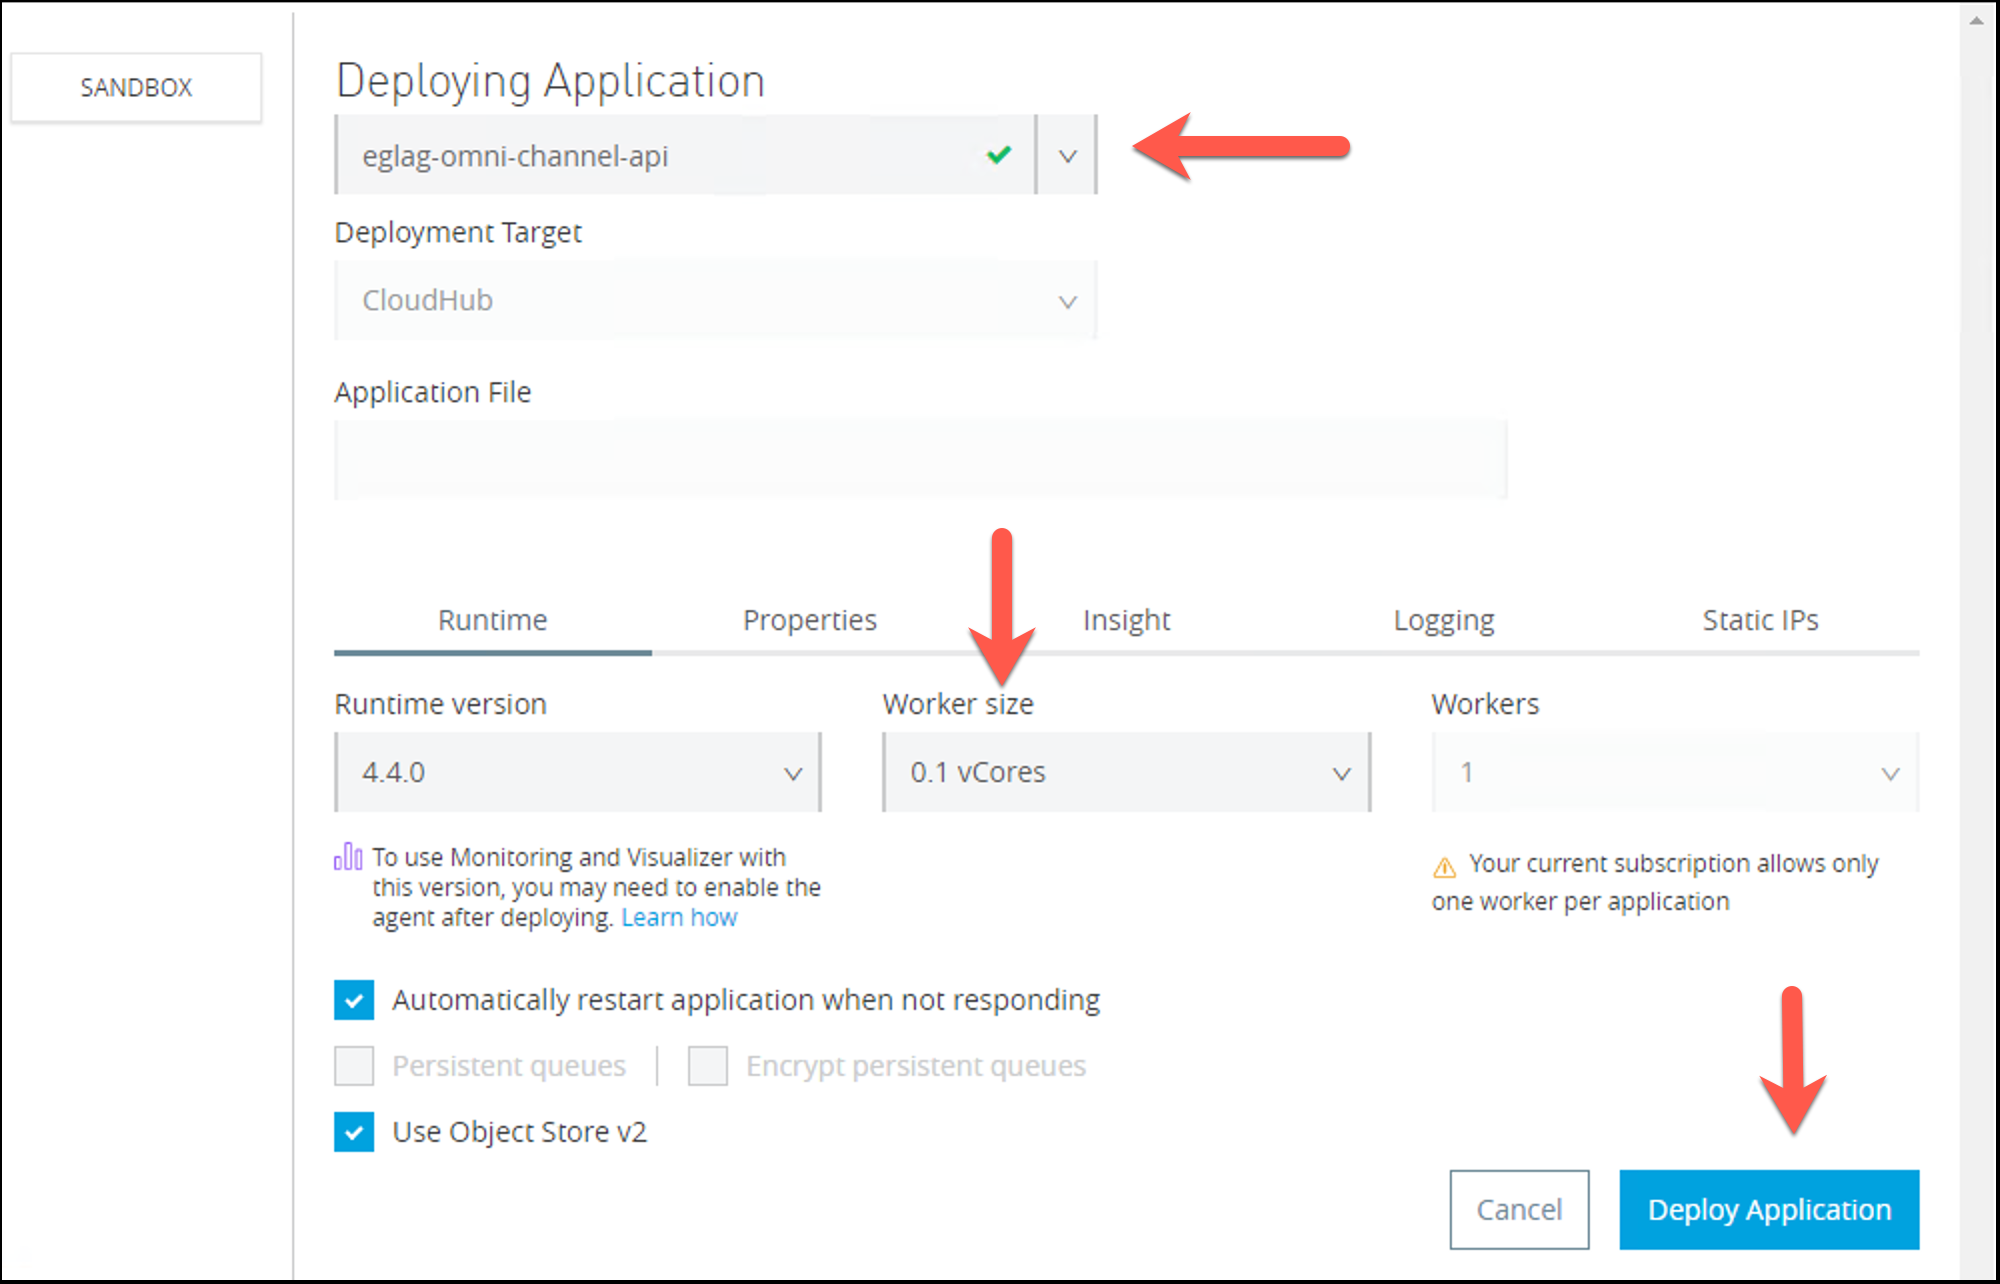
-
Ensure that your application has successfully redeployed using Anypoint Runtime Manager. The status should go from Updating to Started

When you see Your application is started you can continue.
-
Check in API Manager again that the API Status is Active (as in Step 4). You should see the green Deploy Successful in the status bar.
Summary
In this lab, we completed the following steps:
-
Create the API in the API manager>>
-
Complete Omni Channel Project in Anypoint Studio
-
Enable API Pairing with the Anypoint Platform
-
Create the API Autodiscovery global element
-
Test that the Application is Pairing Correctly with API Manager
-
Redeploy Your API Omni Channel Application
We saw how easy it is to enable your applications to be auto-discovered. This provides a simplified approach to manage MuleSoft impLemented APIs across your environment, whether on-premise or in the cloud. You are able to secure and govern your MuleSoft applications without an additional hop through a separate API Gateway. This also provides "last mile security" as policies are applied directly at the engine level. In this lab, we saw how we can deploy our API to CloudHub which can significantly speed up your deployment without having to manage and maintain infrastructure.
For further reading on deploying an API gateway and proxying your API, please refer to the following documentation:

The next (optional) lab will show you how to proxy a legacy API that is not in Exchange.
Please proceed to Lab 5 if you wish.
If not…
Congratulations! You have completed this Module.
Please proceed to next Module


